
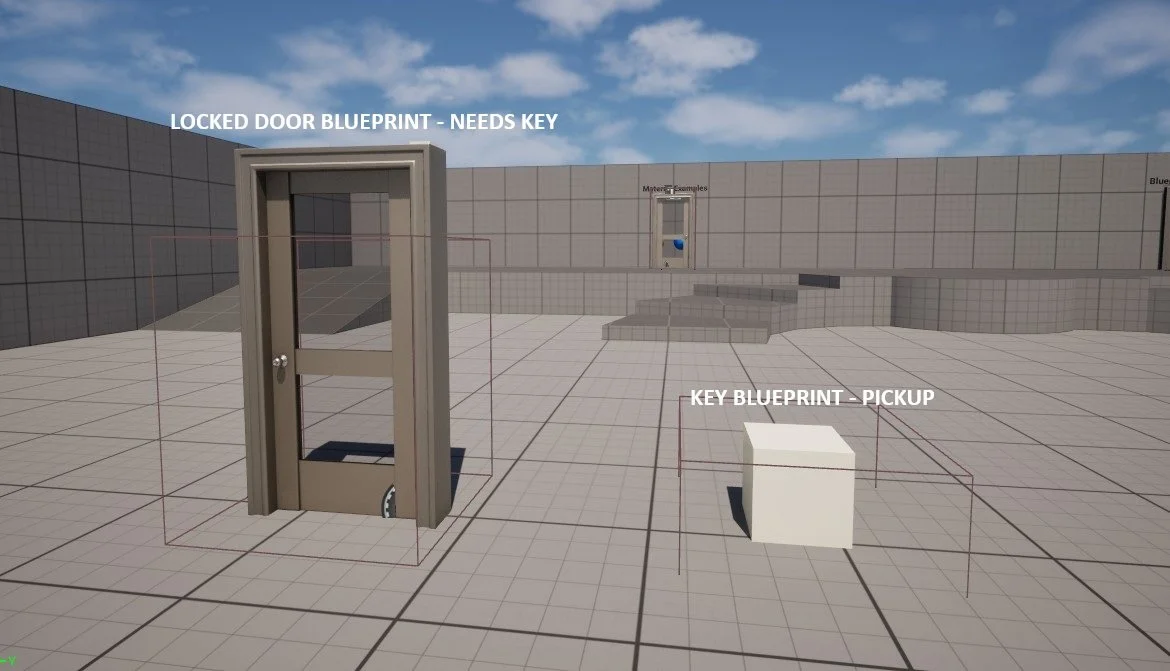
Making a Interactive Door puzzle
The first thing we will need to create is a set of Blueprint Interface elements; these will be used to detect whether or not a player has interacted with an object and register its current state between blueprint actors.
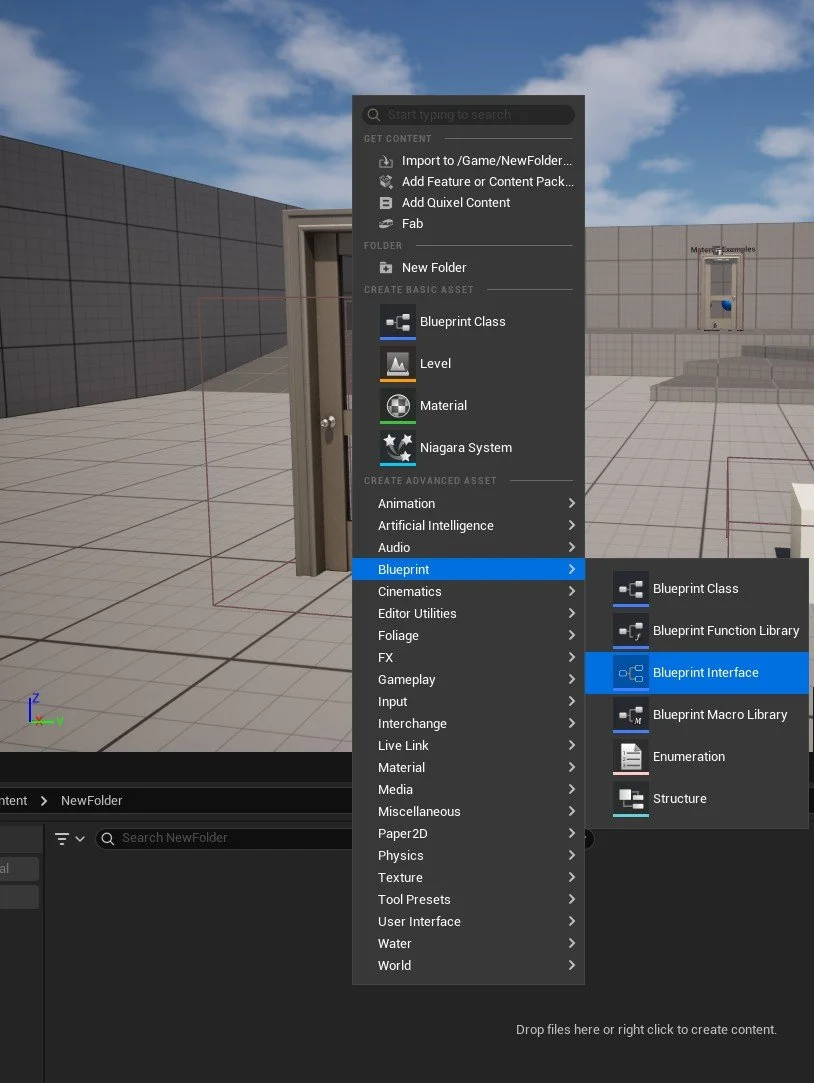
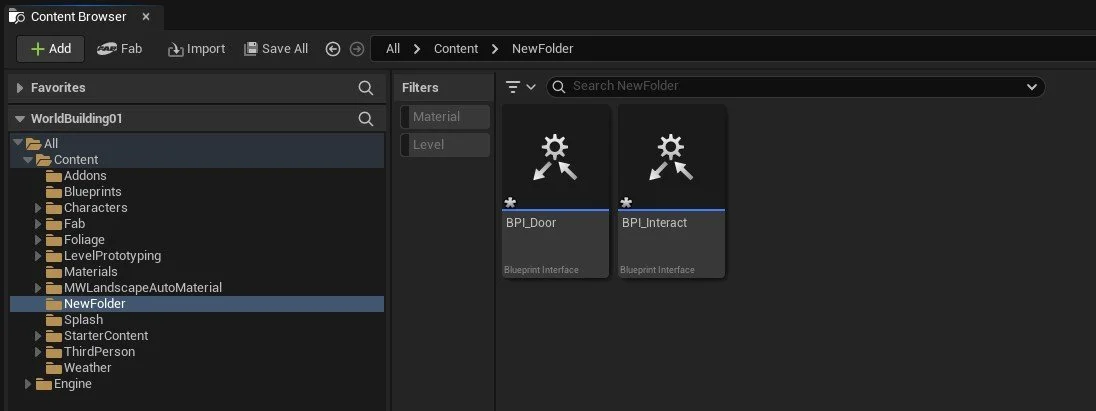
Right-click in Content Drawer, navigate to Blueprint > Blueprint Interface and select. This will create a Blueprint Interface class; we will rename this BPI_Interact. Repeat this step and rename this second Blueprint Interface BPI_Door.
In this tutorial, we will be making an interactive blueprint door actor that requires the player to have already collected the associated key before they can progress.
The blueprint elements we will be making and the processes followed can be adapted and changed to allow for different use cases and interactions.
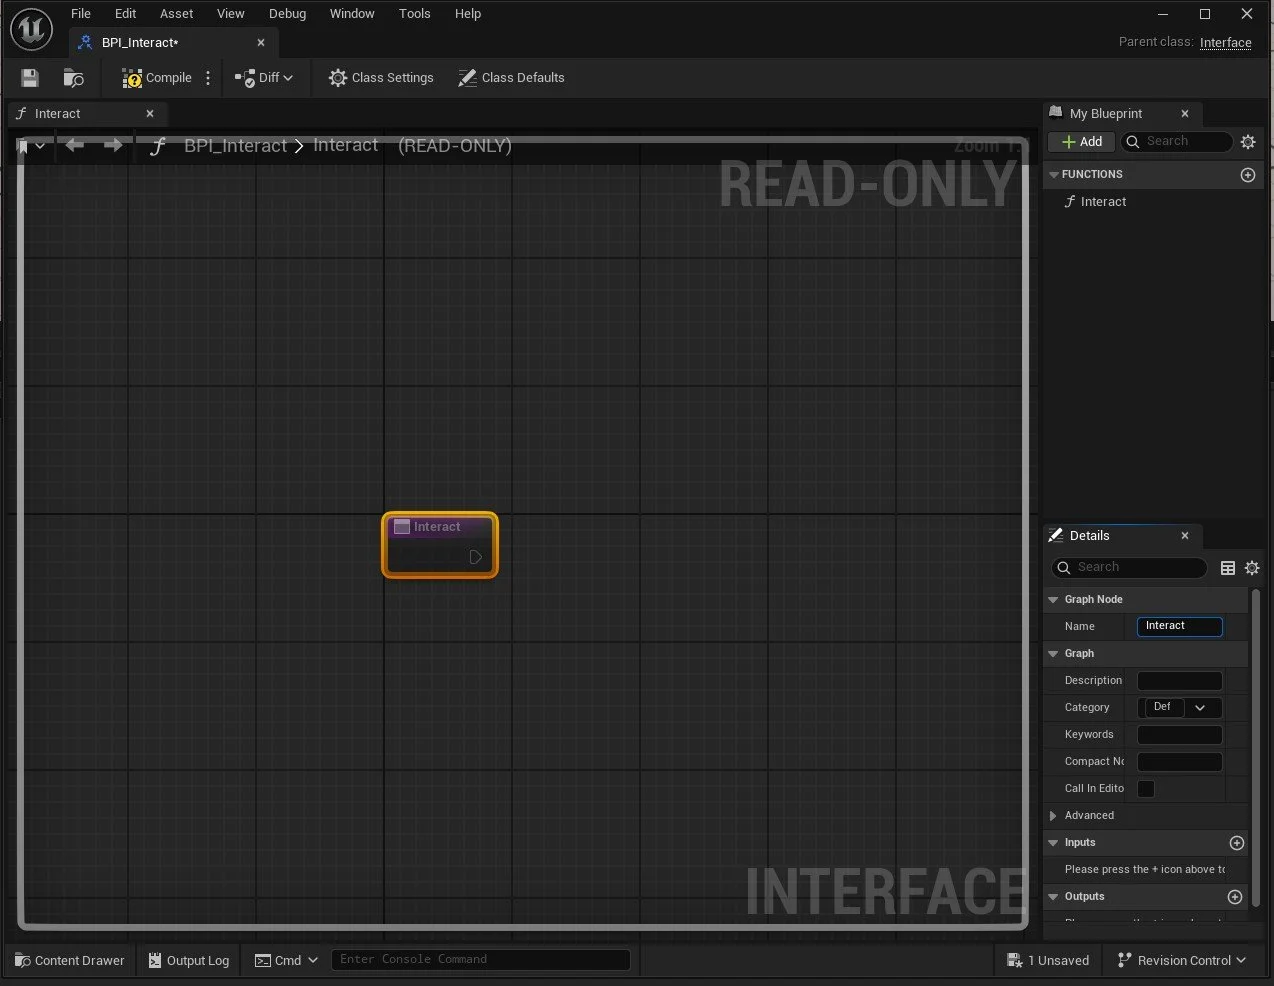
Double-click on BPI_Interact; this will open a new window. Click on the NewFunction node that will be already present within the event graph, and under the Details panel, rename it to Interact.
You can now close this window.
Double-click on BPI_Door and click on the NewFunction node that will be present and rename this element under the details panel to Pick Up.
You can now close this window.
We will now need to set up our player character to be able to interact with the elements within our scene and take advantage of the Blueprint Interface elements we have just created.
In this tutorial, we will be assigning interactions based on the player pressing a keyboard button when they enter a designated area, which will then be checked conditionally against the requirements outlined within the Blueprint actors we will be creating in the next stage.
Navigate to BP_ThirdPersonCharacter in Content Drawer and double-click on it to open and access its event graph.
We will be setting up a blueprint within the Third Person Characters Event Graph.
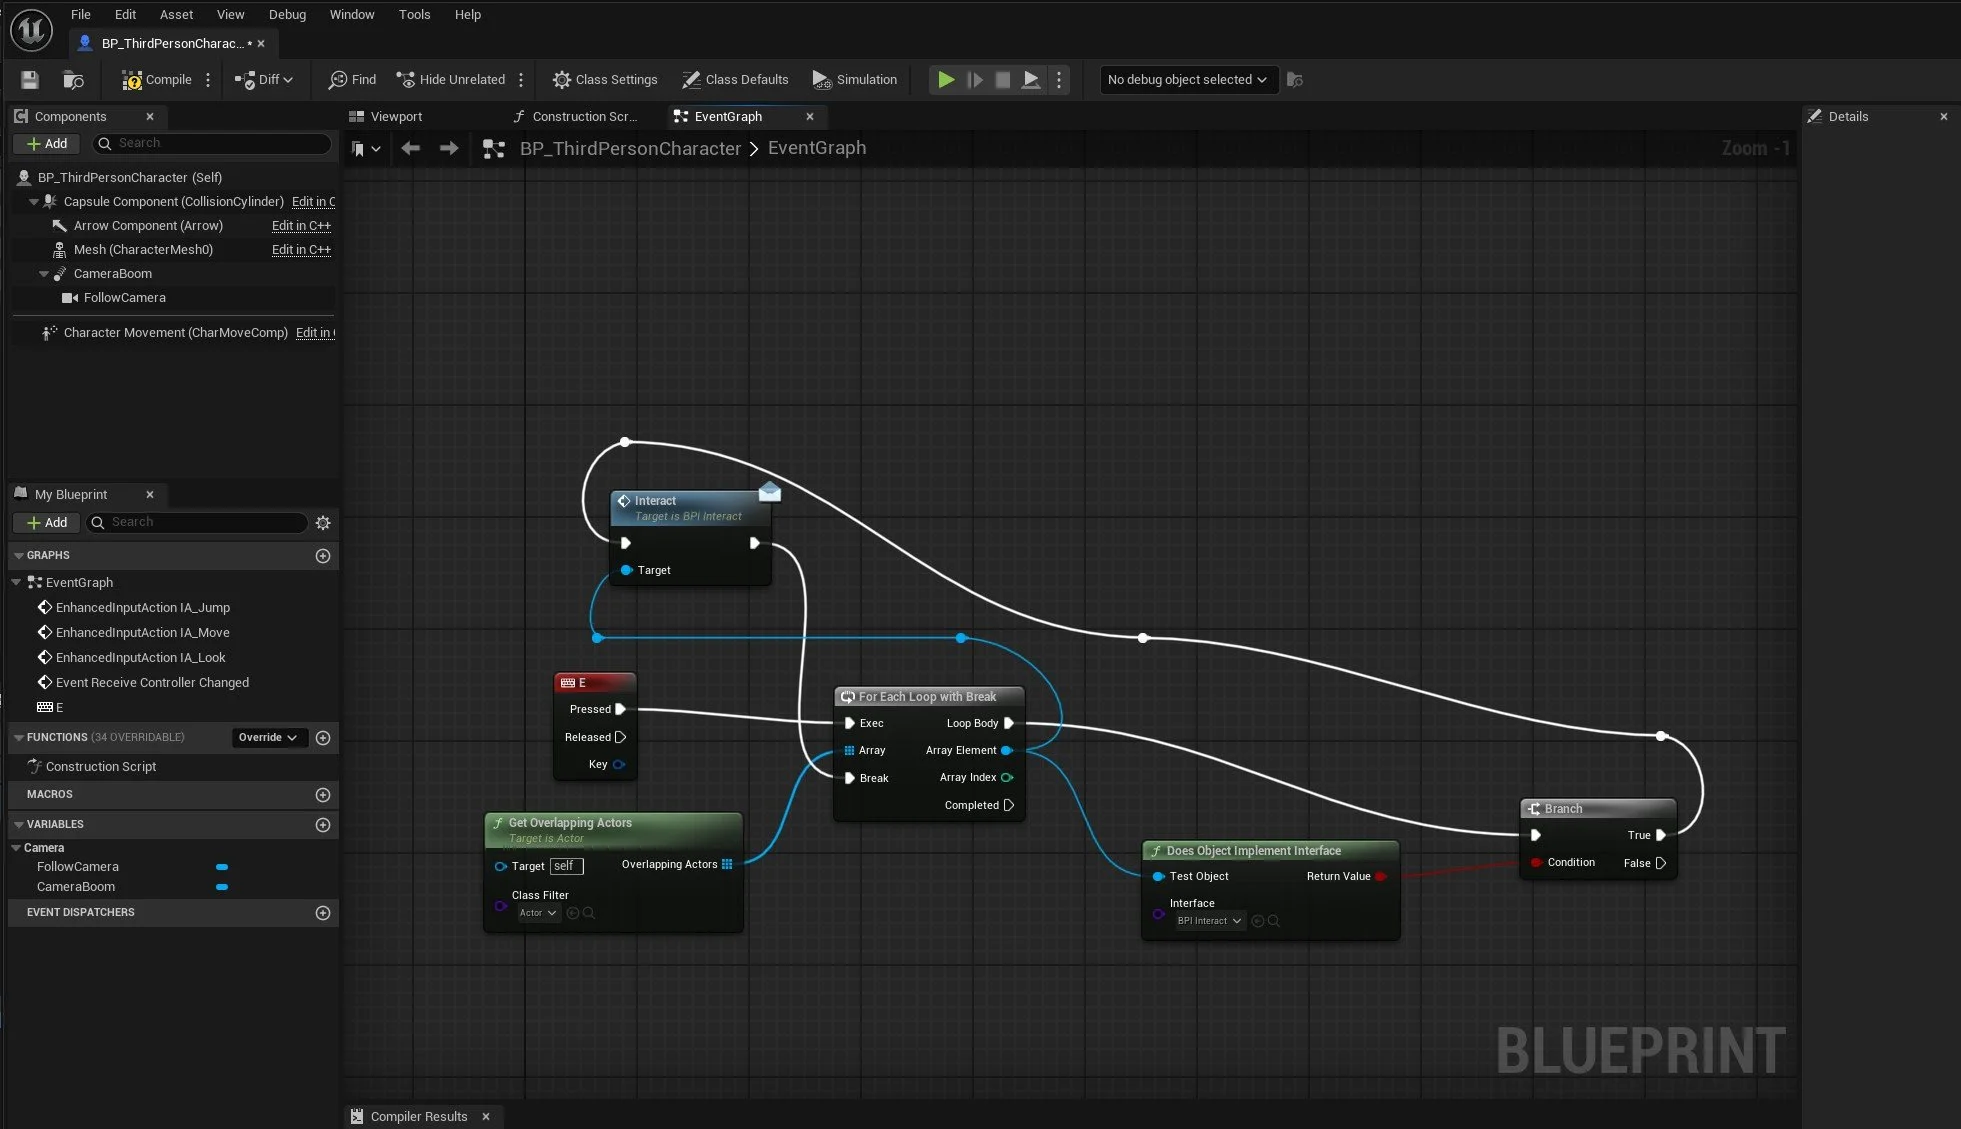
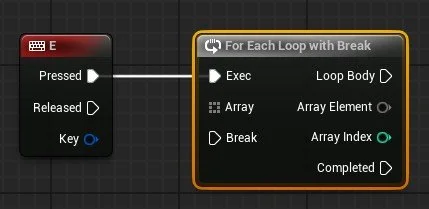
A preview of the node setup is shown on the Left.
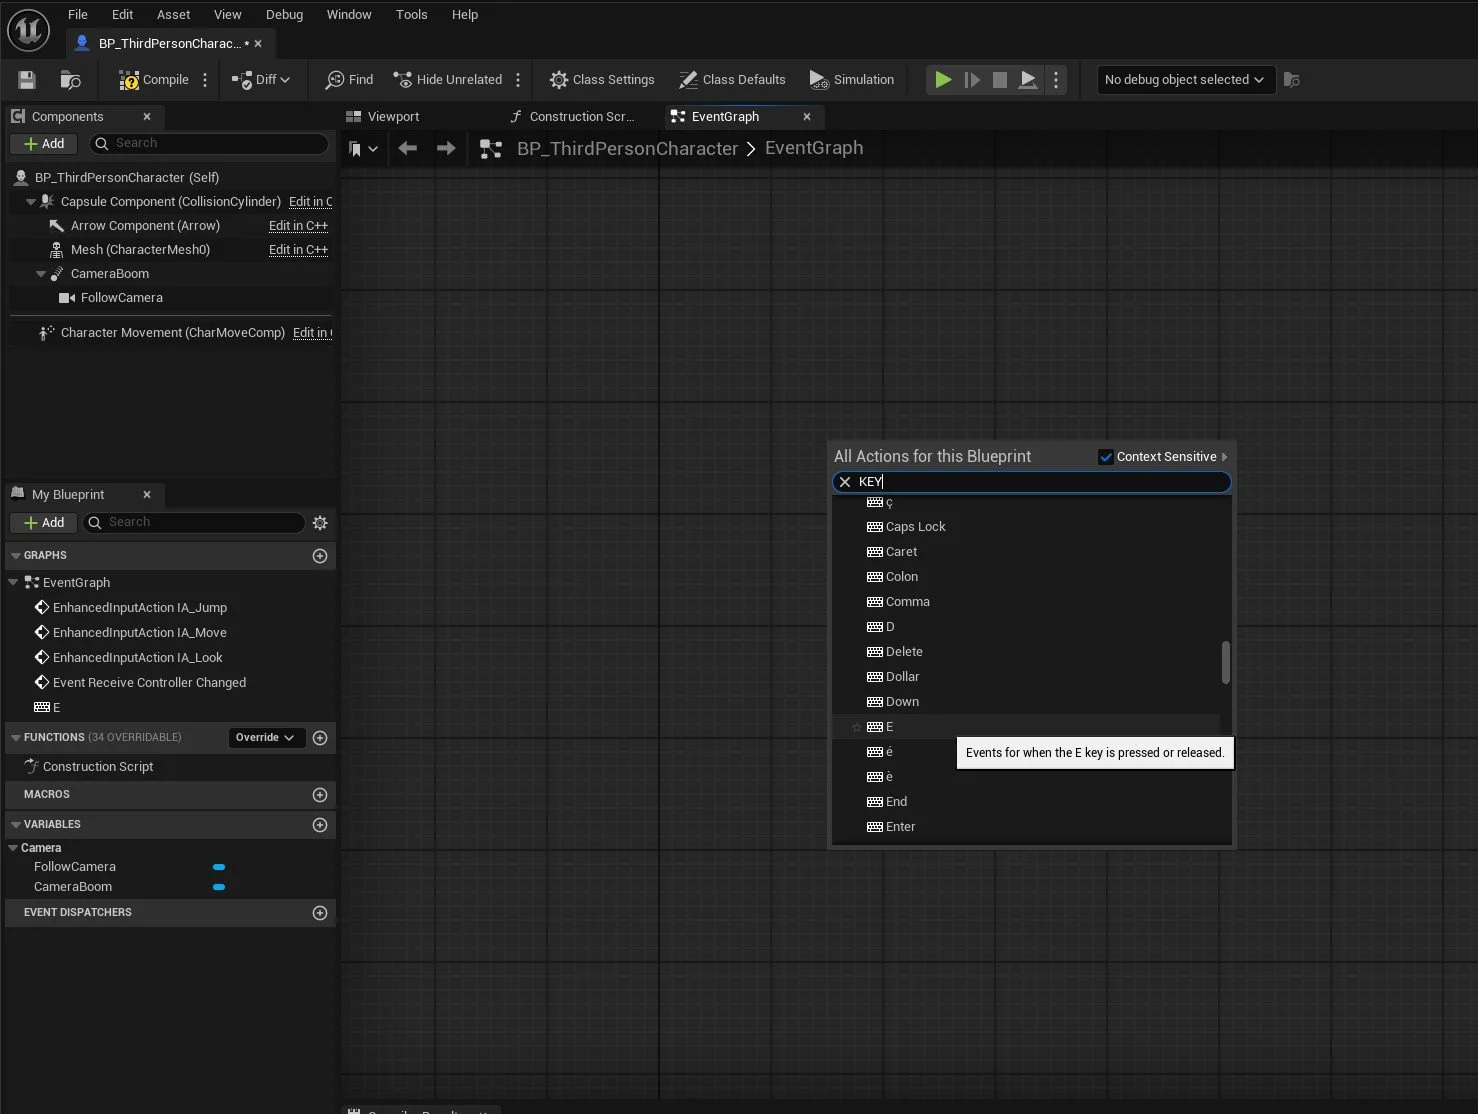
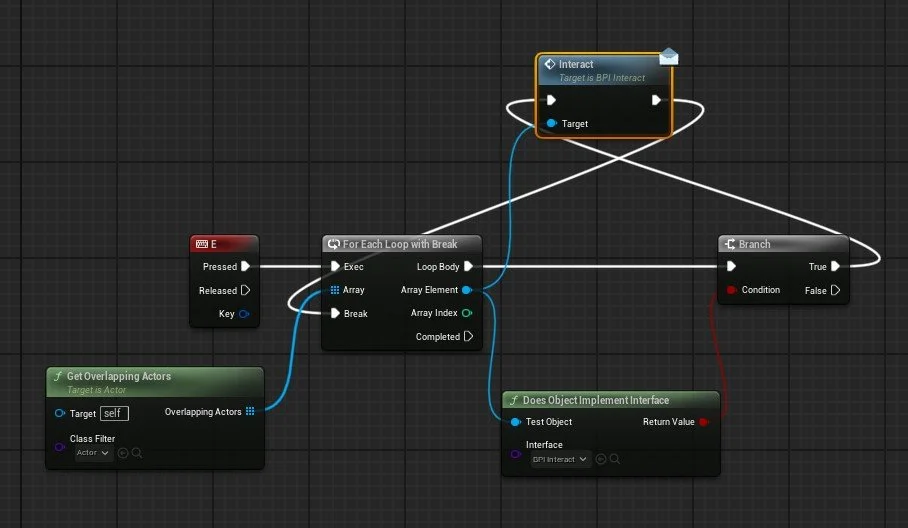
Right-click in the Event Graph area and type in Key and add a Keyboard Event > E node.
We will be adding interaction nodes to the pressed and released outputs of this node.
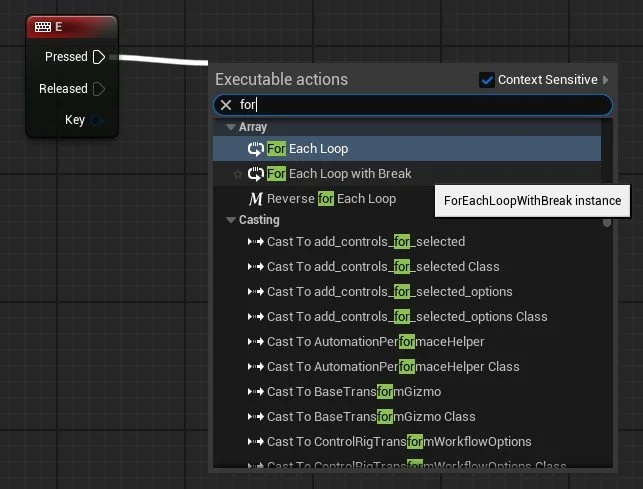
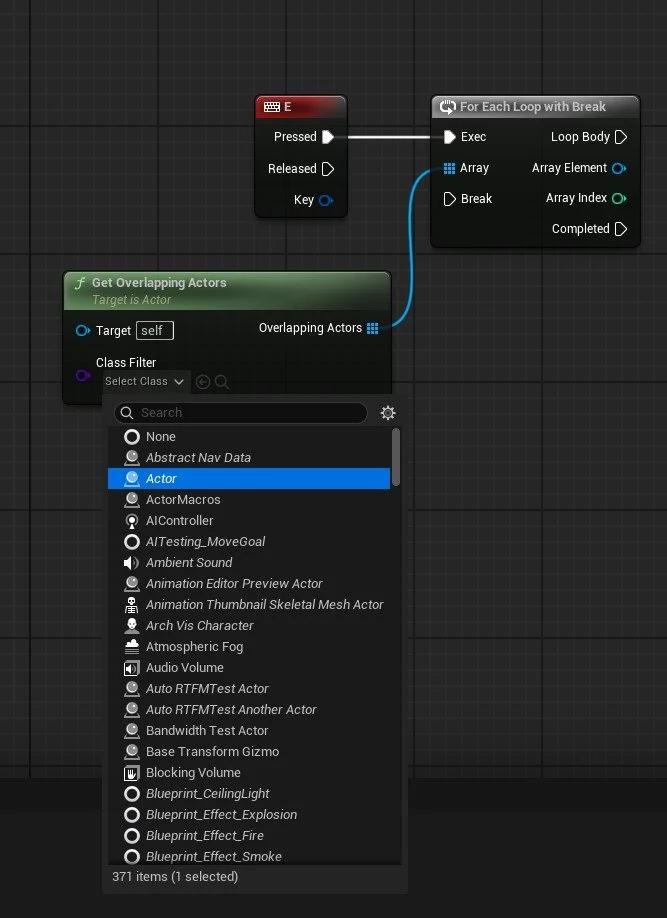
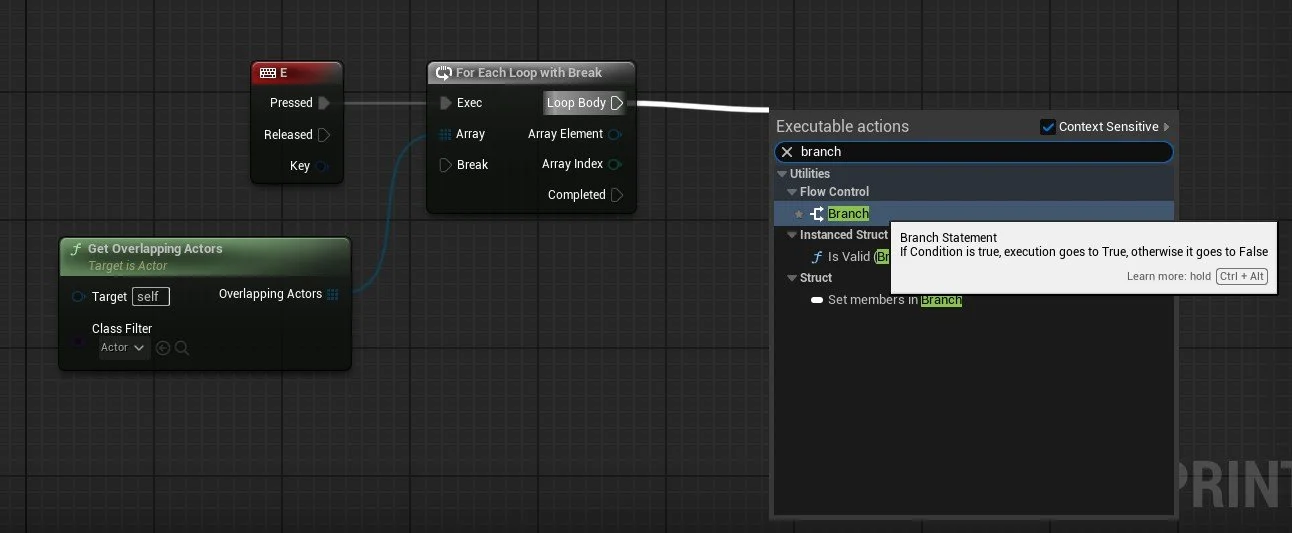
Click and drag off the Pressed output from the Keyboard E node and add a For Each Loop with Break element.
Right-click and add a Get Overlapping Actors Node, connect the Overlapping Actors output to the Array of the For Each loop with Break node.
Change the Class Filter on the Get Overlapping Actors node to Actor class from the drop-down menu
From Loop Body, we are going to add a Branch action (click and drag and add branch)
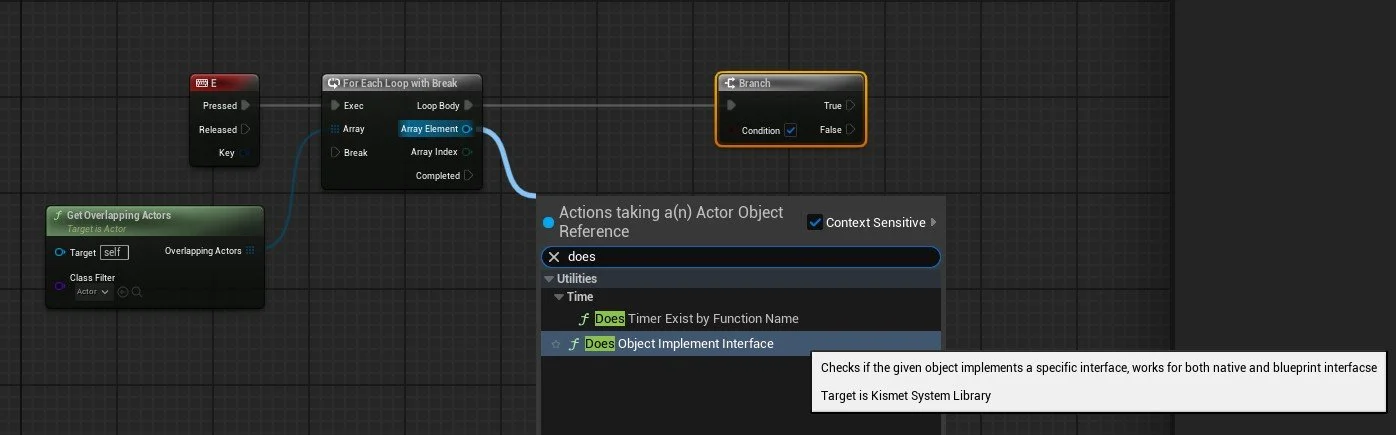
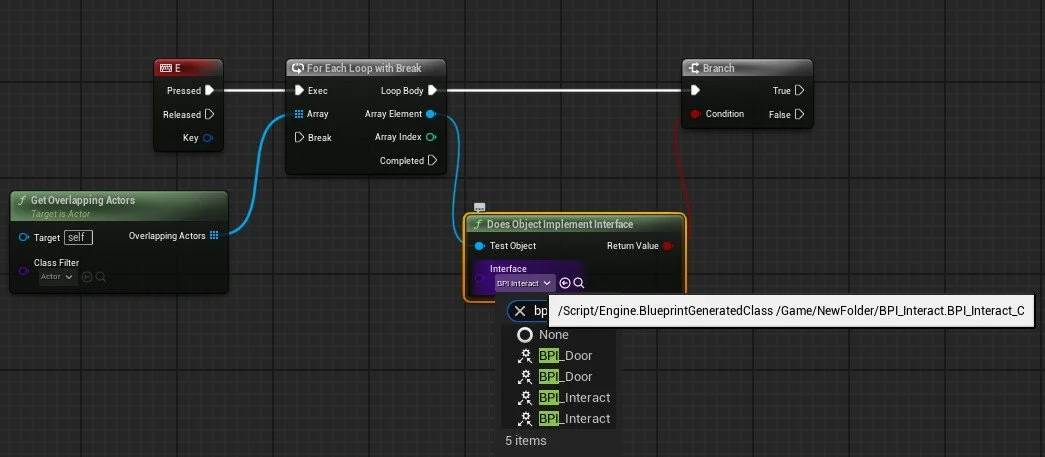
From Array Element, we are going to add Does Object Implement Interface action (click and drag and add, use search at top of menu to search for does to make easier to find.)
Connect Return Value to the Condition input on Branch.
Change the Interface to BPI_Interact from the drop-down menu on Does Object Implement Interface Node
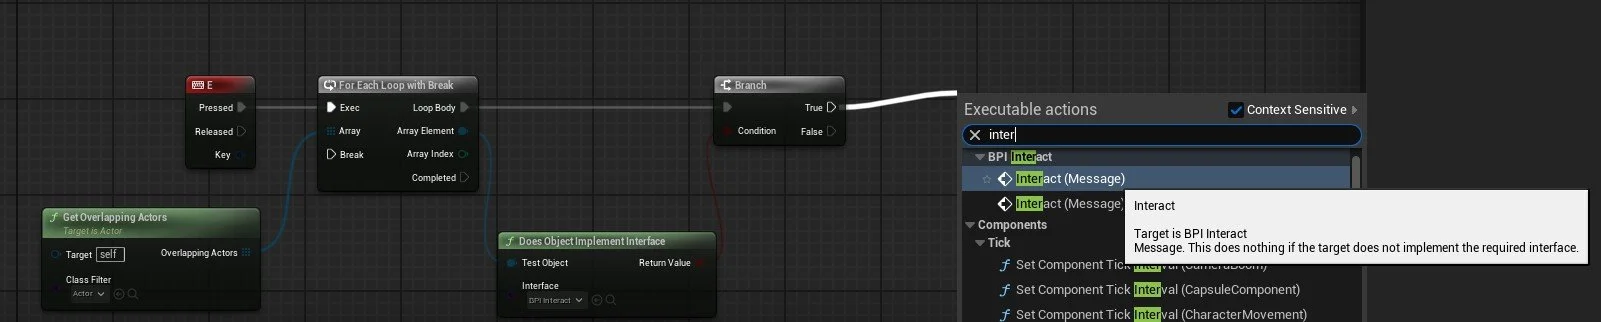
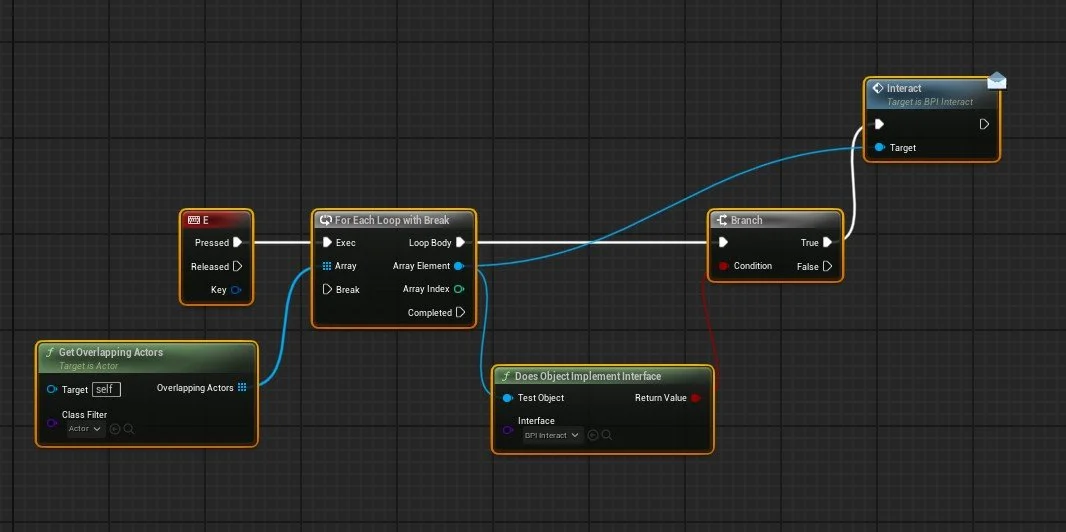
From the Branch node True Output, click and drag and add Interact (Message) from BPI_Interact (search for interact to find quicker in menu dropdown)
Connect the Array Element from For Each Loop with Break to the Target of Interact Node
Connect Interact Output to the Break Input of For Each Loop with Break node. Compile and Save, we can now close this window.
BP_Key and BP_Door Actor Setup
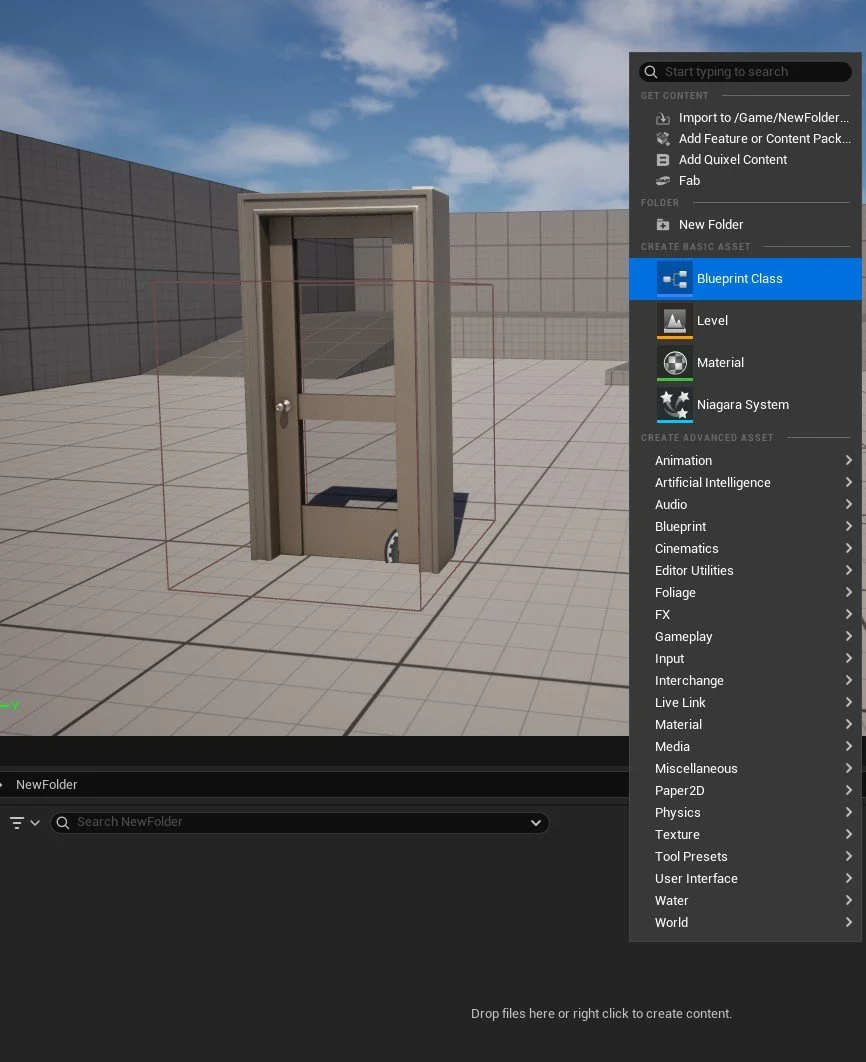
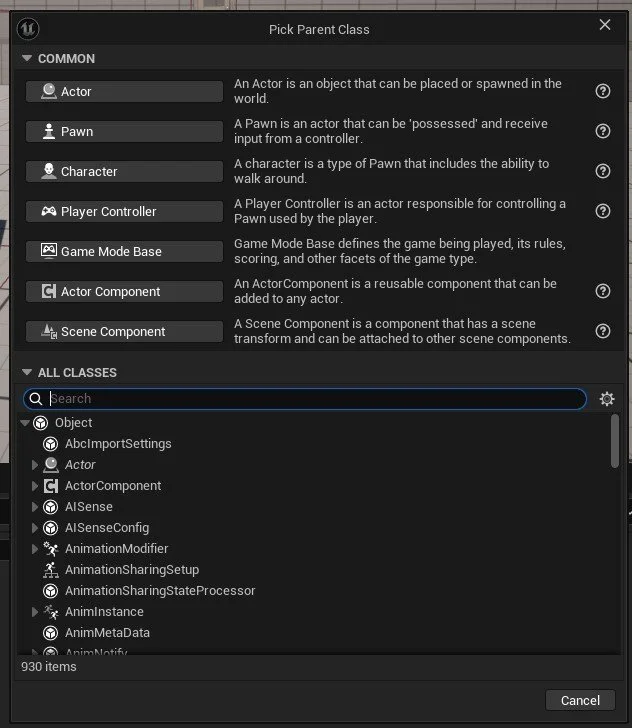
We now need to create our Interactive door and Pickup Key actors, We will be doing this by creating two separate Blueprint Class > Actors.
Right-click in Content Drawer select Blueprint Class, a new window will open Select Actor and confirm. Right-click on this newly created Blueprint class and rename it to BP_Door.
Repeat but rename second Blueprint Actor BP_Key
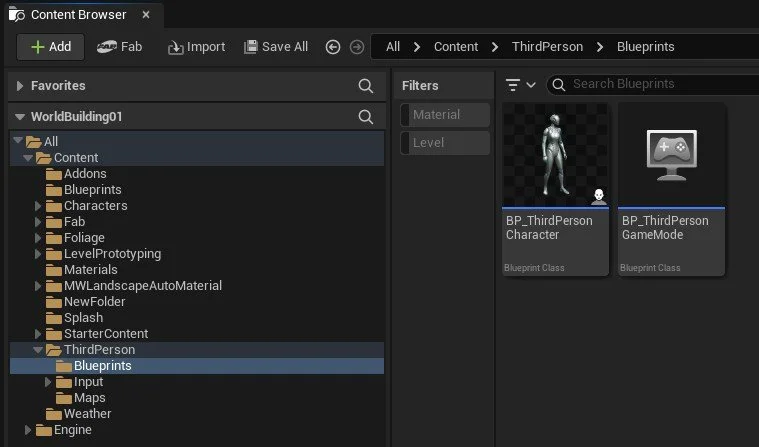
You should now have two Blueprint classes in Content Drawer, one BPDoor and other BP_Key
< It should look like this
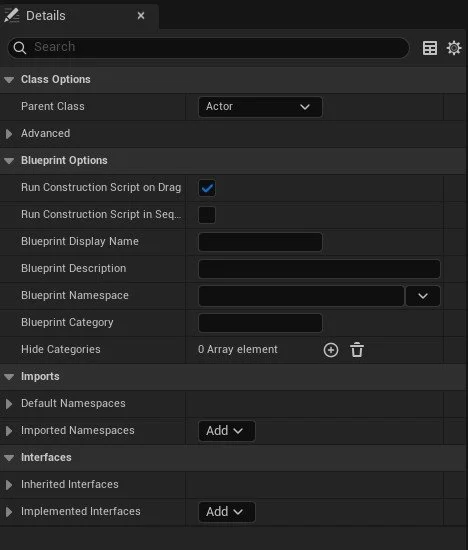
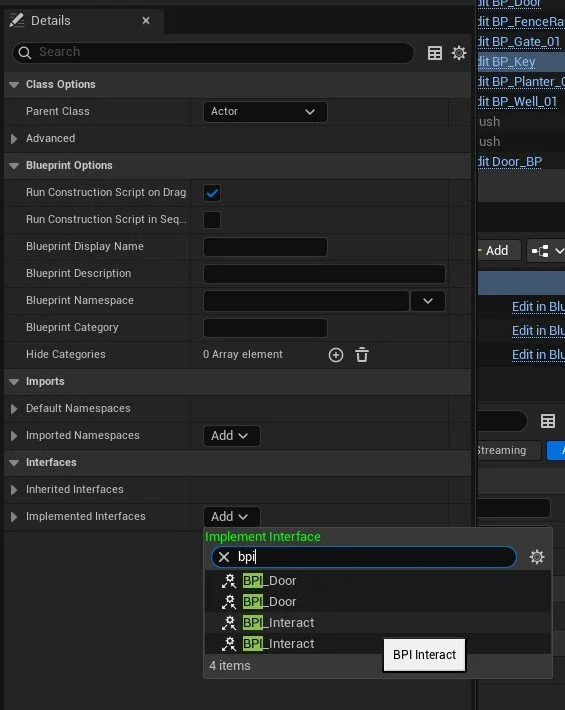
Click on Class Settings at the top of this window, then look towards the details panel. we are going to need to add our BPI_Interact interface we created earlier.
Click and drag the Door variable into the event Graph area and select Get Door
Let’s start with BP_Key as it is the easiest to set up.
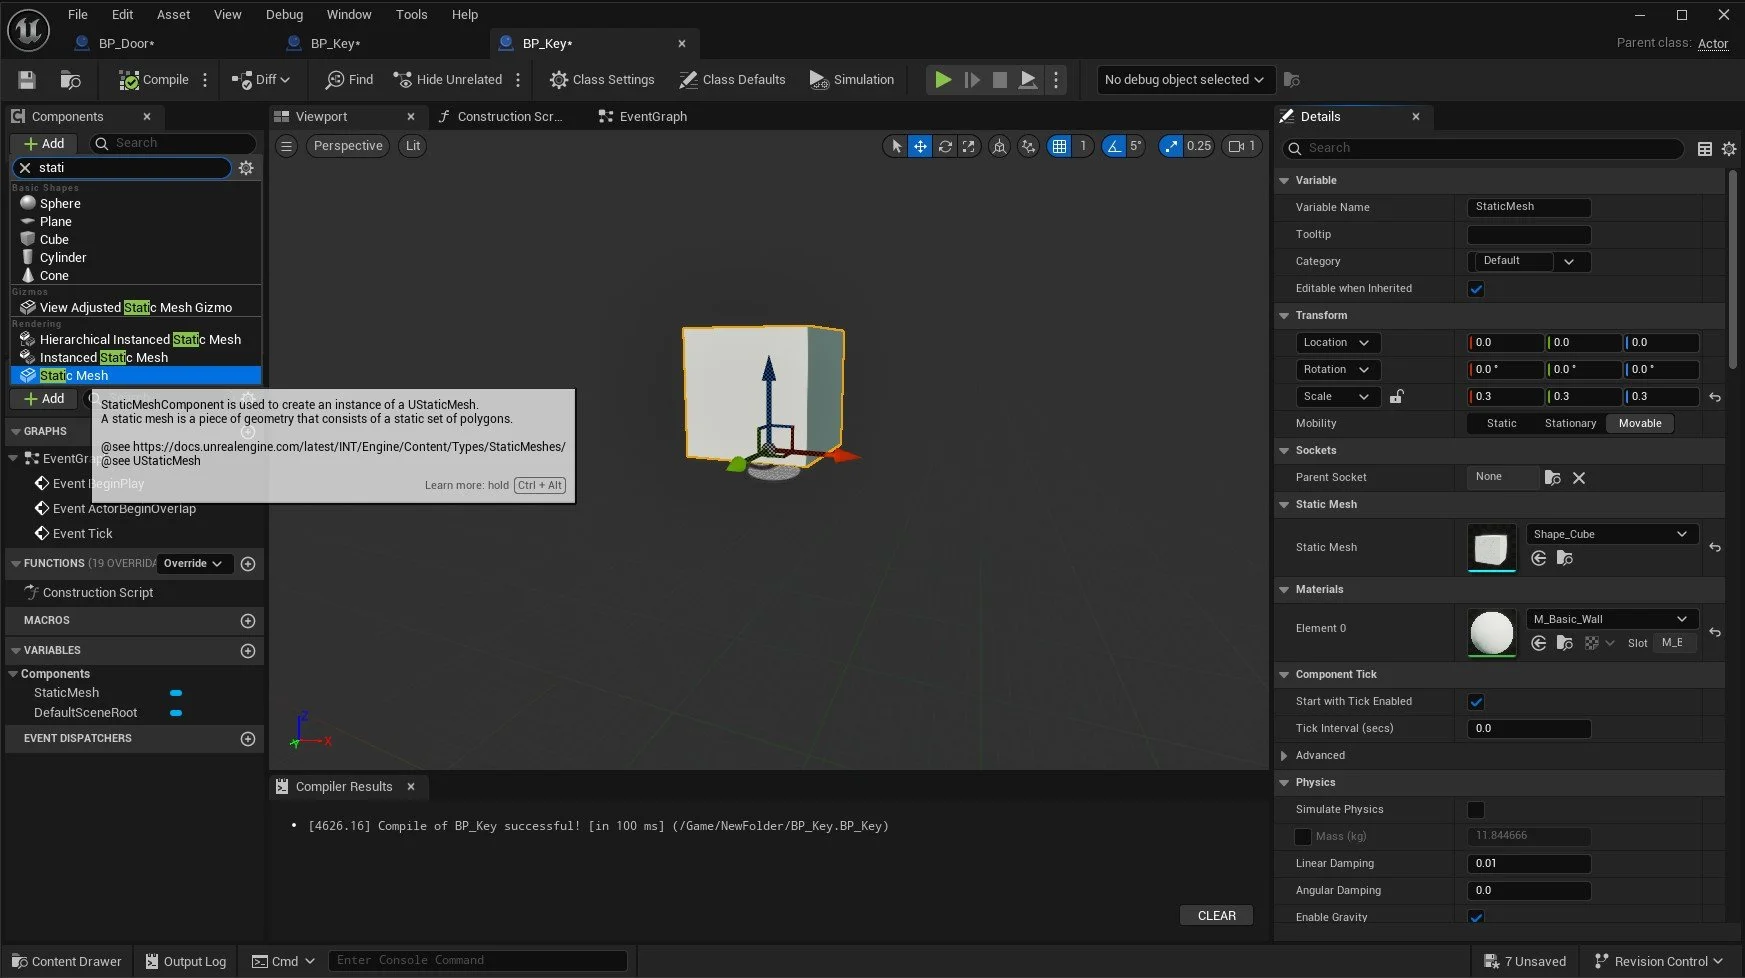
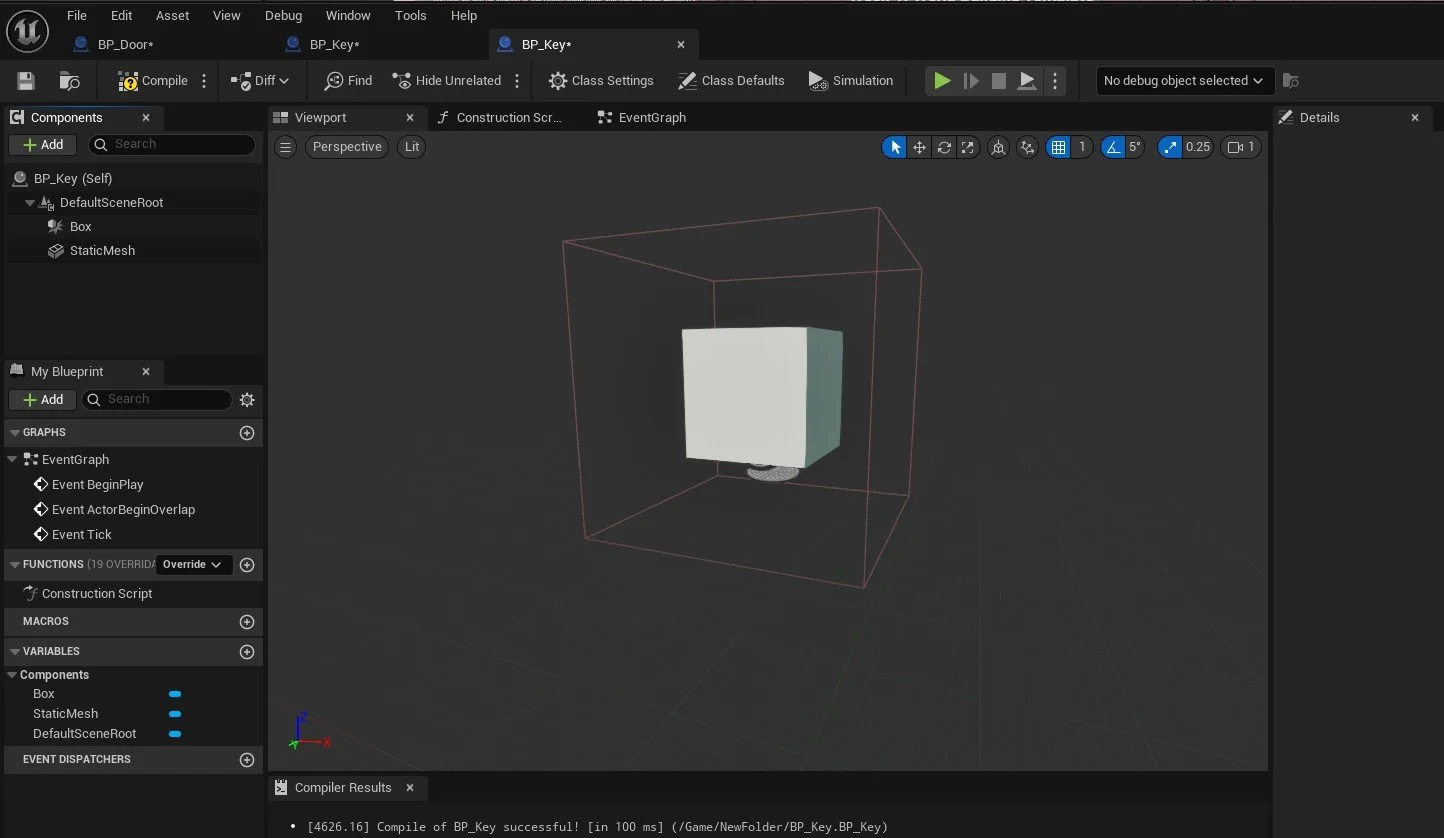
Double click on BP_Key in Content Drawer; under components in this window, click on +Add and select Static Mesh. Click on Static Mesh and, under details change Static Mesh from None to Cube (or any appropriate static mesh you may have in your project).
We will now need to add a Box collider to check whether the player is within range of the object to pick up and register interaction. Click on +Add again, and this time, add a Box Collision. Under details, change the size of the Box extent so it covers the static mesh and can allow the player to get within an appropriate range for pickup.
Under the Interfaces within Details panel, we will be adding our BPI_Interact Interface under Implemented Interfaces > Add.
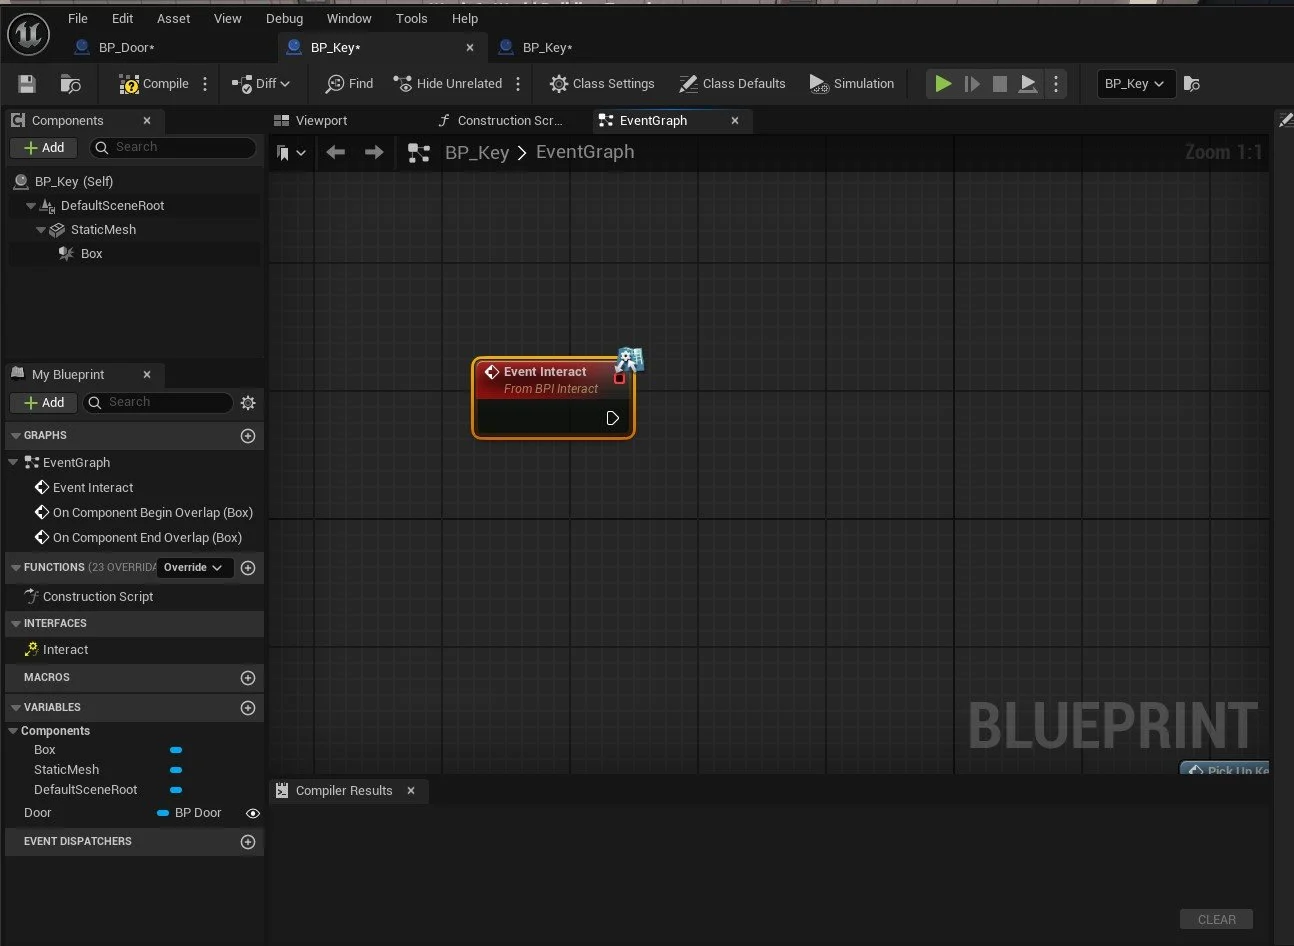
This will add an interact parameter under Interfaces on the My Blueprints panel.
We can now reference this within our event graph going forward.
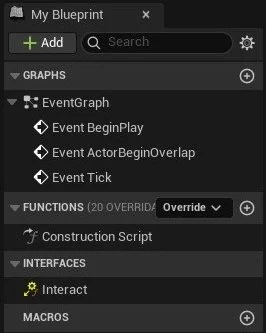
Double-click on the Interact under Interfaces (My Blueprint Panel) to bring up the Event Interact node, where we can now start adding in our blueprint for our key.
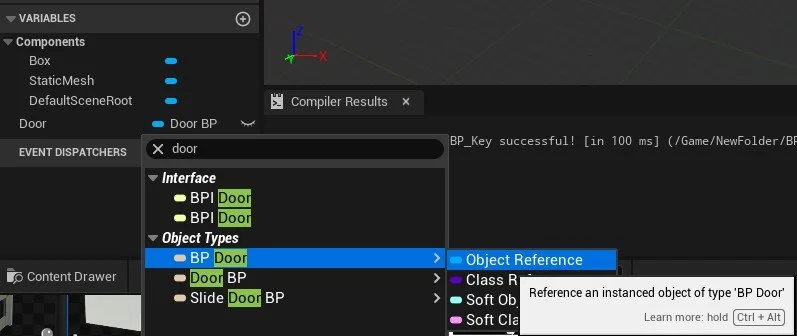
We need to create a Public Variable that will reference back to BPDoor so we can select which door the key will work with, you can do this via clicking on the + under Variables name this variable Door, click on the boolean that it has created (click on word boolean to change variable type) and search for BP_Door and chose Object Reference. To make it so we can select which door the key responds to, click on the closed eye next to the Door variable until the eye is open. This makes the variable public so we can change the value/target within the editor later.
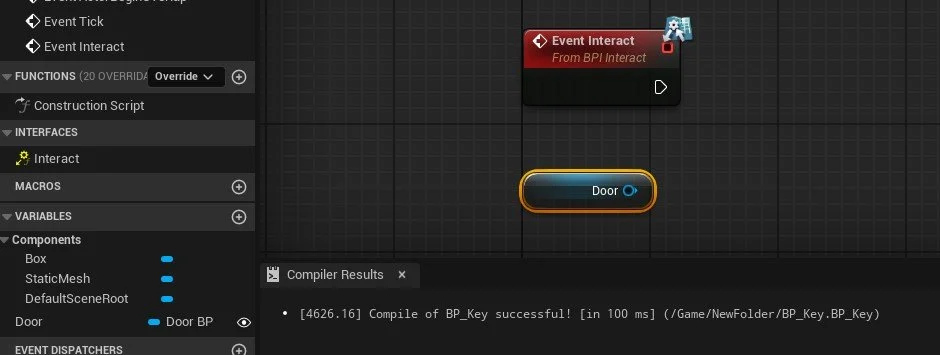
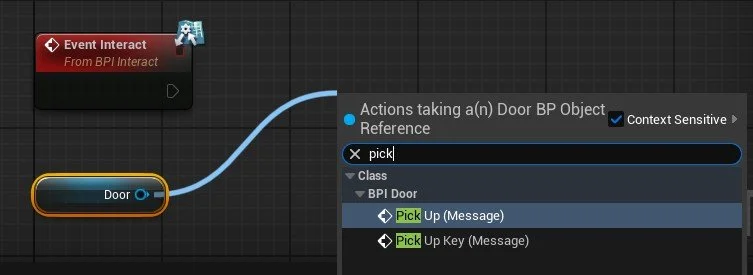
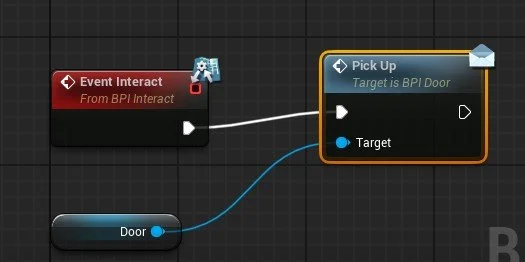
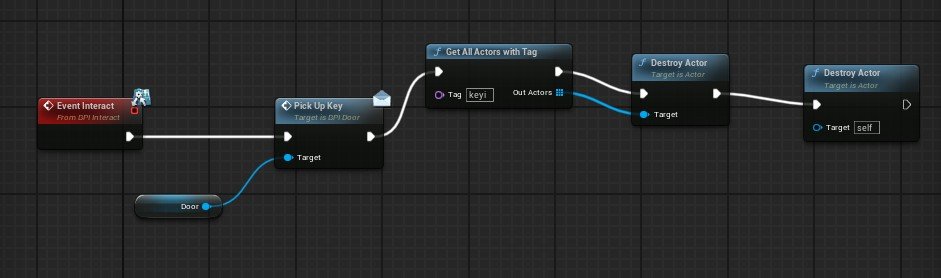
Click and drag from the Door node output and add Pick Up (Message) to add to the event Graph.
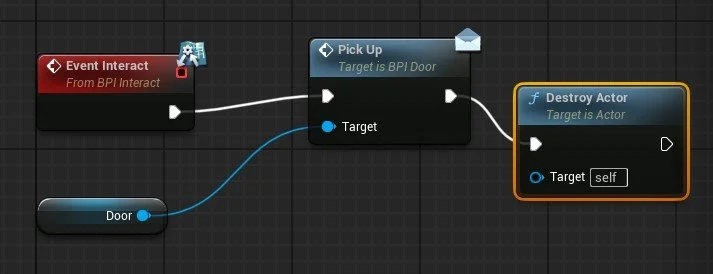
Link Event Interact Output to Pick Up Input like pictured.
We now want the key to disappear once picked up, so we will be adding a Destroy Actor to the output of Pick Up with the target being self. Click and drag from Pick up output and add Destroy Actor.
We can now Save and close this window.
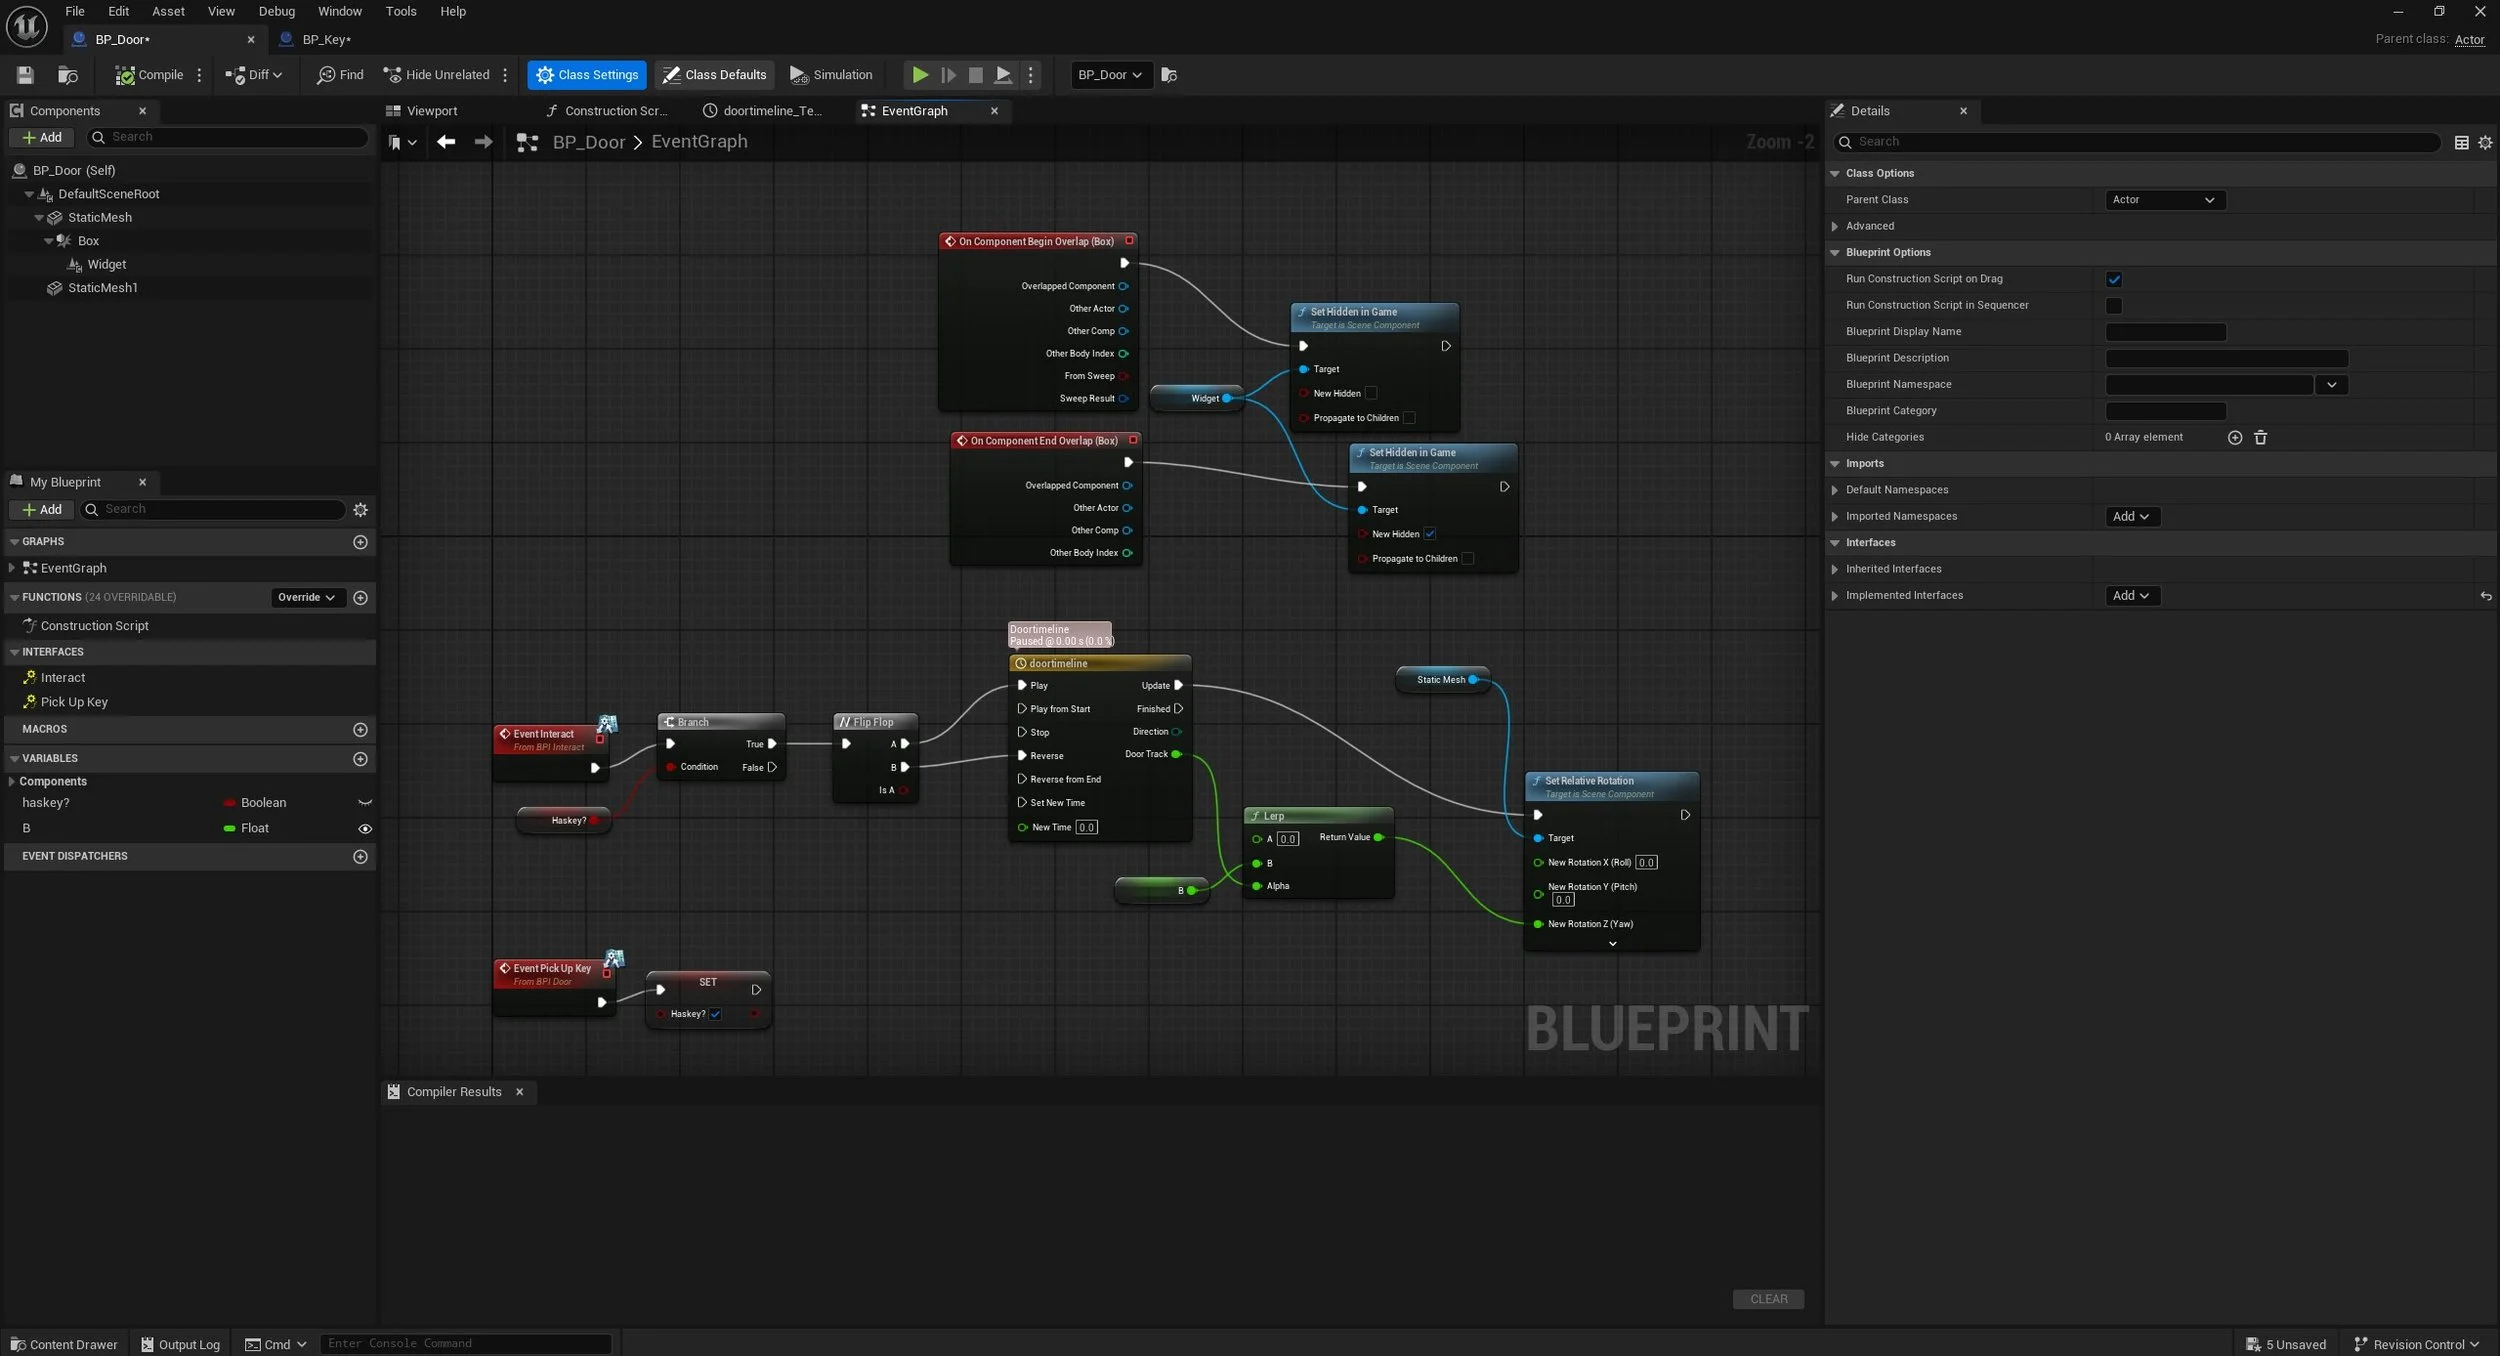
BP_Door Setup guide is underway please bare with the above screenshot is the final blueprint for the door interaction including a Widget component that has not been covered yet.
If we are more adventourous we can start to also use actor tags to control elements and select actors in scene for example we could lock off pathways based on player choice such as which door they choose key for will remove other key option for other doors locking them into one pathway